.Photo Essay:
Major Rust Repair
Repair of Dog Leg (Driver's Side)
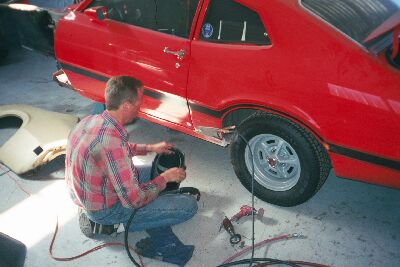
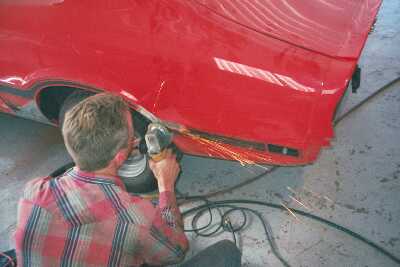
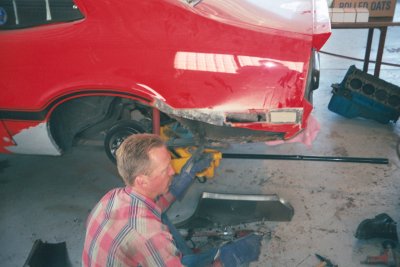
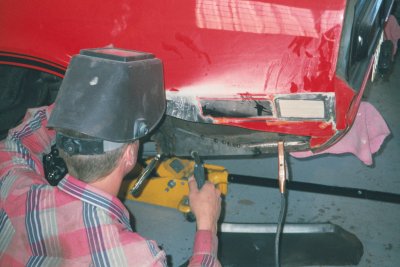
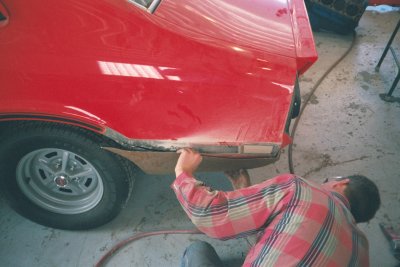
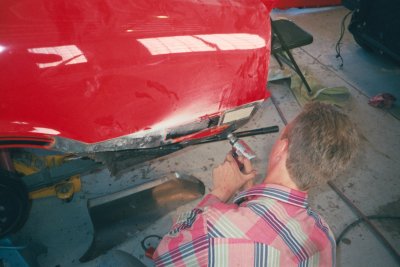
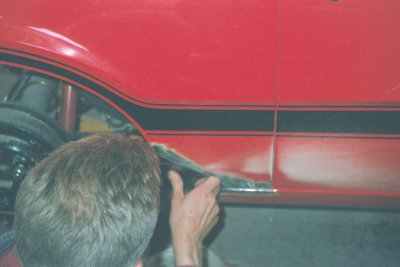
Though it appeared to be in good shape, my '72 Maverick was in fact filled with rust, but it was all repairable. In this shot, Geoff Watson
has started to work on repairing the rust on the dog leg of the driver's side. He has ground off the paint and is here adjusting some equipment. The tire was removed in a few more steps and should have been at the first.
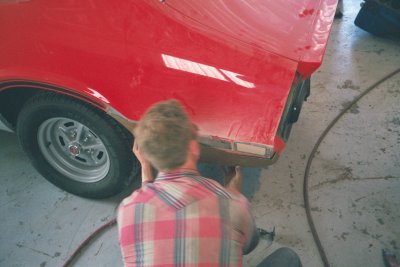
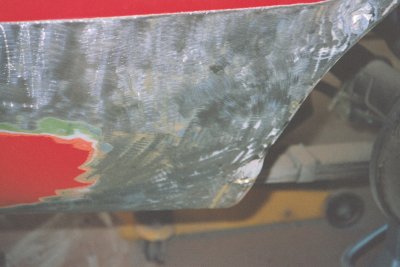
Geoff is using a body hammer to explore the extent to which the rust has penetrated the shiny Mustang poppy red paint. Once the rusty
metal has been trimmed away, the paint is ground away from the surrounding area in preparation for welding in fresh sheet metal. Always use eye protection.
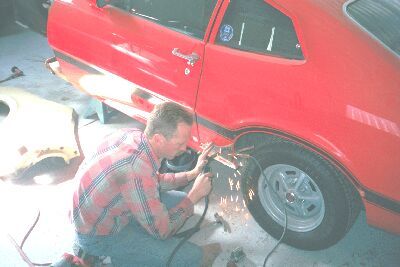
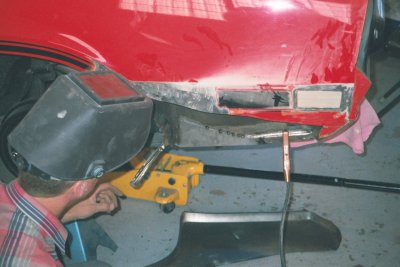
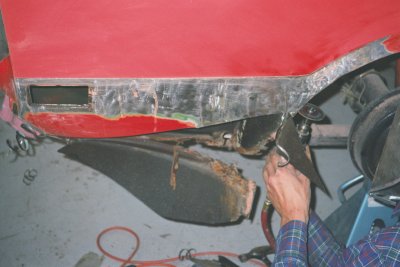
My body man is using a wire-feed welder to speed the work and reduce warpage. Geoff should be wearing eye protection here... On
my instruction, Geoff has welded up the panel joint line for a smooth shape.
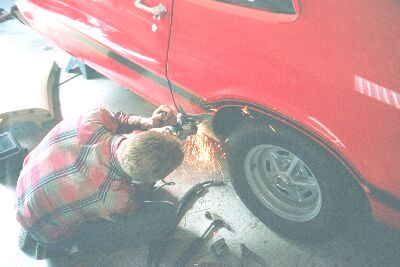
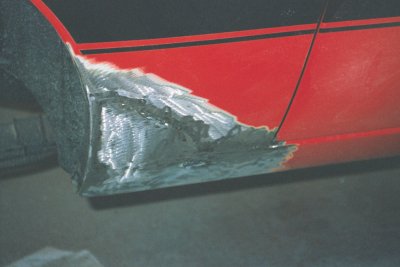
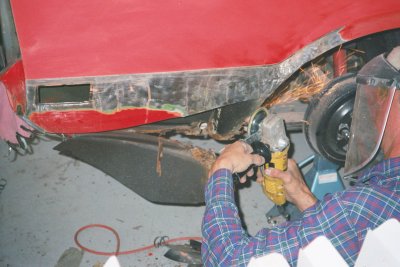
With a complete weld completed, Geoff is grinding and hammering the weld here to both smooth the surface and strengthen the panel. I
have no idea why I left the tire/wheel on the car at this point.
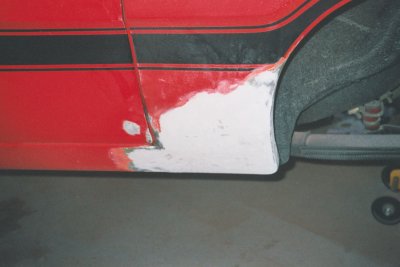
Once the weld has been ground and hammered, I wire-brushed the entire area to remove offending material that would interfere with
adhesion. I then spread a thin coat of the best polyester surfacing resin ("bondo" to most) over the area. If the metal work is good, the thickness should be less than 1/8". When cured, use an air
powered or human-powered line board with 80 grit paper to smooth the bondo. A second coat will undoubtedly be needed.
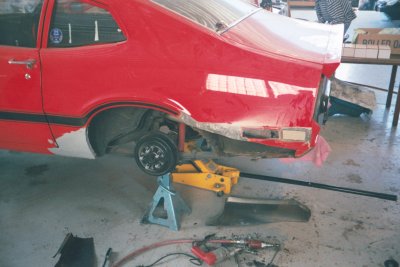
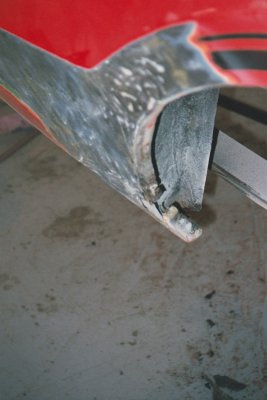
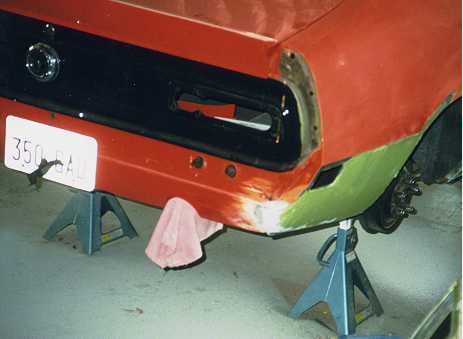
The rest behind the wheel well (note that I finally got smart and pulled the tire!) was even worse because it had been previously
repaired with a LOT of bondo. Geoff had to do a lot of grinding to just find the underlying, and rust-perforated, sheet metal. Here, Geoff is excavating in the area just behind the lip of the lower fender. Repair of Quarter Panel Rust (Driver's Side)
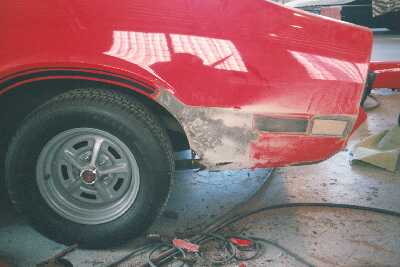
Geoff is here using a small die grinder to clean out the recessed lip into which the quarter panel side marker light mounts. It initially
appeared that there was some rust in this area prompting Geoff's exploration but the problem just turned out to be thick paint and marginal bodywork from the early repaint job.
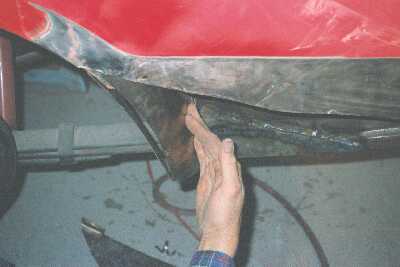
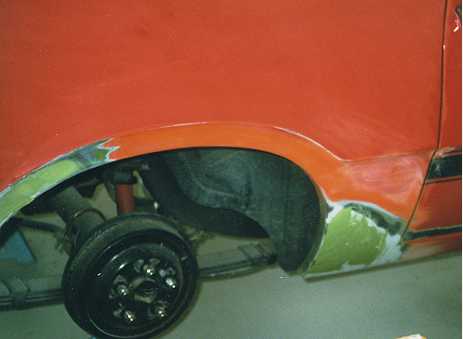
You can see here how grinding on the leading edge of the lower quarter panel has revealed a lot of rust and thick bondo.
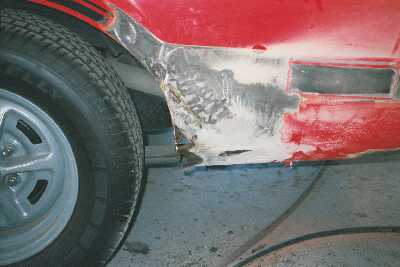
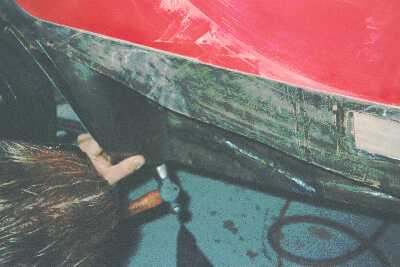
Seen better in this close-up shot, check out how the lip defining the wheel well has been revealed to be heavily perforated with rust. It's
clear that the entire lower quarter panel will need to be replaced.
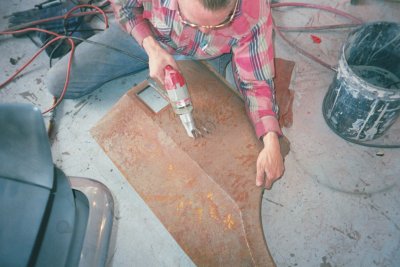
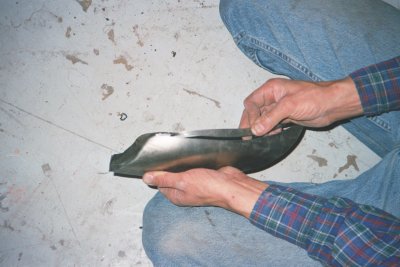
Years ago, I acquired some aftermarket rear quarter panel which turned out to be pretty good. I let them acquire some very light
surface rust that was easily removed with naval jelly and Dupont Metal Prep. Here, Geoff is trimming the fresh sheet metal to fit the area to be removed from the car.
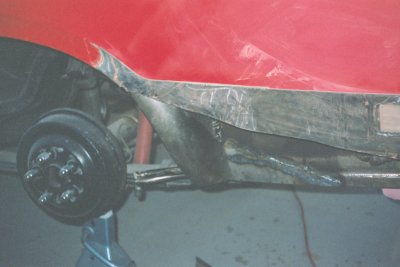
Geoff has here returned to the car and, using a carbide cut-off wheel, is starting to remove the sheet metal. The rust was so
serious that the inner wheel house shape needed to be replaced along with that shape that is formed when the lower quarter panel resolves itself into the trunk sheet metal.
It was almost disheartening to see how much sheet metal needed to be removed, though Geoff is enjoying himself.
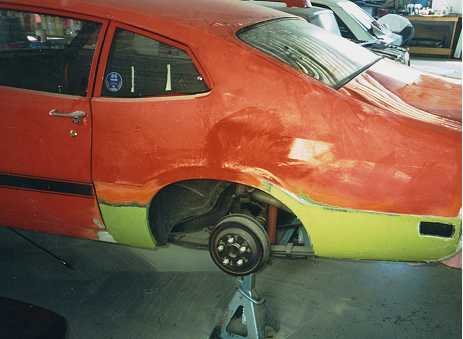
Seen without anybody in the picture, the extent to which the rusty sheet metal had to be removed is startling. Look carefully to see in
the inner vertical trunk pattern (just outside the gas tank) that will need to be re-constructed and integrated into the exterior sheet metal soon to be installed.
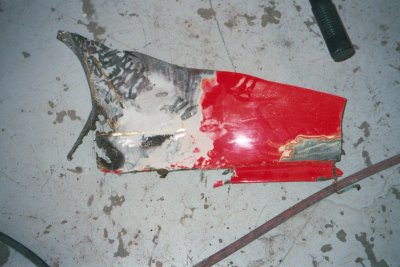
Here's the offending sheet metal that has been unceremoniously dropped to the ground.
Geoff here has started to prepare the remaining good metal for a fresh inner wheelhouse liner (made from fresh reproduction pieces for
a '65 Mustang, purchased from Tony Branda).
Work continues as Geoff trims the inner wheelhouse sheet metal for installation but it must wait until the exterior sheet metal is first installed.
The inner wheelhouse shape worked into the general shape previously is trimmed again to fit the exterior sheet metal. There
are a lot of variables here that are difficult to integrate to one another, so take your time to get it right.
Once we were satisfied with the shape and fit of the inner wheel house sheet metal. Geoff has started to here to tack weld the sheet metal into place.
You can see how the inner wheelhouse has been test-fitted to the inner fender. It has been likely tack-welded into place.
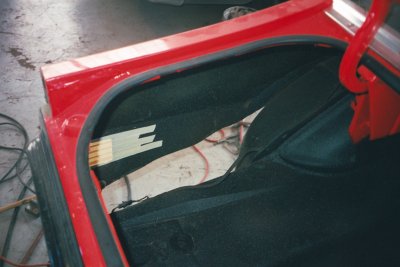
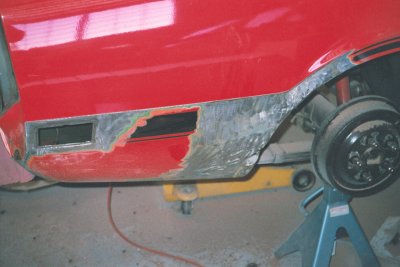
Here's a dramatic shot a scene from inside the car through the gaping hold in the lower quarter panel. The side marker light hole has
been taped over to keep sanding dust out of the trunk.
The trimmed, fresh rear quarter exterior panel sheet metal has been test-fitted here. This new sheet metal was placed on the car and
removed several times fot test fitting. It is best to take the time to get everything to fit properly.
It is important to make surre the entire perimeter of your patch panel mates correctly to the body.
Geoff discovered that he needed to pull the patch panel more upward to get everything to fit.
Here Geoff trims a bit more sheet metal off the body to get a good fit.
With the panel lightly tacked into place, Geoff is here gently tapping the sheet metal into place. This is part of the process to resolve the
sheet metal to the inner wheelhouse sheet metal shape.
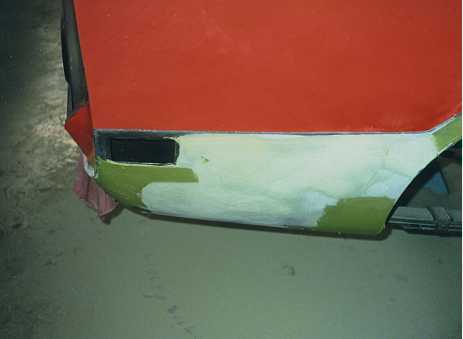
This is the final skim coat of surfacing resin. After sanding, catalyzed PPG etching primer was applied.
Repair of Quarter Panel Rust (Right Side)
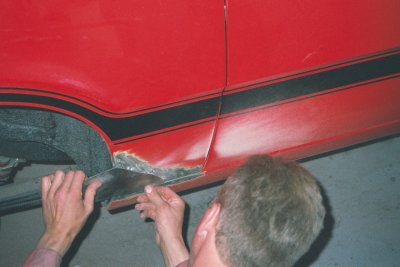
Starting on the passenger side, essentially the same rust problems were encountered. In this view, Geoff has ground away the bondo
(that's the pattern of light-colored material (dust) on the quarter panel and door), and is here starting to fit the metal patch panel.
The original factory 'seam line' will be welded solid as it was on the other side to achieve a smooth, one-piece look.
With the patch panel carefully welded (don't use a wire feed welder in a straight line, but rather weld in 1" intervals to avoid warpage),
Geoff is here starting to grind the weld followed by hammering to relieve the stress. Be careful with a grinder because the heat produced can also warp sheet metal.
Check out the extent of this patch panel. In this view, the area has been ground and hammered, and is ready for a thin coat of bondo. I
removed more paint on the lower quarter panel below the character line because a thin coat of surfacer would be applied over the whole area. Be sure to wipe the area down to remove grinding detritus and other particulate matter.
In this view, a second coat of bondo has been applied to fill in small surface imperfections revealed after the first coat (the lighter color, here) was block sanded.
Right Rear Quarter Panel Repair (Right Side)
Here, the grinding process has started on the lower rear quarter panel to determine the extent to which the original rusted metal
needs to be removed. As before, lots of bondo was encountered.
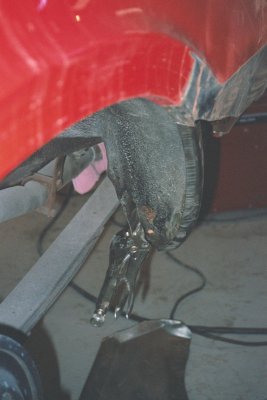
A close up view shows the degree to which the rust has perforated this panel. The Maverick design wasn't terrific to begin with, and the
lack of sealing between the inner and outer sheet metal didn't help. The drain hole plug deep inside each quarter panel (which always seemed to fall out and admit water) also didn't aid in avoiding the
dank, rust-producing environment that promoted rust.
Look at how rust has penetrated the lip around the rear quarter panel. The inner wheel house was badly damaged by rust. Most of this lower panel will need to be removed.
Geoff is here trimming the original sheet metal and starting to fit the inner wheelhouse shape. Note the just-removed quarterpanel piece
with rust and bondo laying on the ground, inside facing upward.
The inner wheelhouse has been cut to fit, and tack welded in at this point, and Geoff is lightly grinding it to fit to the fresh outer sheet metal.
Though all the steps shown for the passenger side are not shown here, here the first coat of bondo has been line sanded smooth and a
followup coat has been applied here to remedy some surviving surface imperfections. Don't rush this step let the bondo really cure before applying primer/surfacer. This material will shrink for a
few days and will also 'vent,' so be patient.
In this view, the step of welding the quarter panel to the rear valence can be seen. I wanted a smooth, integrated look, so all
seams have been welded. Check out the 2/3 round radius previously cut into this customized valence to permit me to tuck the repro '67 Shelby exhaust tips upward in the valence shape. The chrome tips are protected here.